This tutorial will explain how you can activate the UM options for a user.
There are two ways to activate the UM options for a user:
- via the Exchange Management Console
- via the Exchange Management Shell
In this tutorial we will do it via the easy way, via the Exchange Management Console.
First we startup the Exchange Management Console and open the Recipient Configuration and choose mailbox. The middle part of the screen will display the current users who can use Exchange.
By selecting the user for which you want to enable UM you will get an option in the right menu called activate Unified Messaging a wizard will be opened.
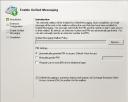
Click the button browse to select the policy which you want to assign to the user. Then in the pin section select the option to manually enter a pin or let Exchange generate a pin. Besides that you can select the option Require user to reset pin at first telephone logon, the user then needs to change his pin after his first logon.
Click on the next button to proceed, you will get the following screen:
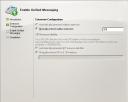
Choose the extension/phone number which you want to assign to the user and click the next button.
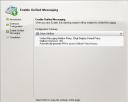
We reached the final step, Exchange will give a short summary of the things we configured. When you click on enable all changes will be applied and the user can use the UM options.


