
This tutorial will help you to install the Exchange UMTestphone. This tutorial will not contain info on how to configure Exchange 2007 UM.
Microsoft has made this piece of software to let you test the Exchange 2007 UM funcionalities without needing extra hardware such as a PBX. In most cases I prefer to test on a client instead of a server. The only disadvantage of this software is that there is no installer for it so you need to copy some files manually. Lets start with the system requirements:
- working soundcard with a microphone, the microphone is not really needed.
- Microsoft .NET Framework 2.0
- working Exchange 2007 UM environment
De first systemrequirement is no problem in most cases; most laptops and desktops now a days contain one standard. The second systemrequirement most times is not an issue also. You could check easily is you have it installed already. Look if the following directory exists %SYSTEMROOT%\Microsoft.NET\Framework\v2.0.50727 exists. If you don’t have it installed you can download it via the link below or install it via Windows Update:
After downloading the software it’s just a couple of clicks to have .NET 2.0 installed.
The last system requirement sounds logical; this is what we want to test.
Now that we met all systemrequirements we can begin with copying some files. You can find all files on the server which has the UM role installed on it. All files need to be copied to a folder, you don’t need to create the folders that exist on the server.
There are two ways to copy the first three files, first we will use the official way as described on Technet.
You can’t find the following three files via Windows Explorer, you need to copy them via a dos box:
- <%windir%>\assembly\GAC_32\Microsoft.Collaboration.Media\MediaVersionNumber\Microsoft.RTC.Collaboration.Media.dll
- <%windir>\assembly\GAC_MSIL\Microsoft.Collaboration\CollaborationVersionNumber\Microsoft.RTC.Collaboration.dll
- <%windir%>\assembly\GAC_32\SIPEPS\SipsepsVersionNumber\SIPEPS.dll
The CollabortionVerionNumber and SipsepsVersionNumber will let you see which version is currently running. For exampe a CollaborationVersionNumber can be 3.0.0.0__31bf385.
The other way is to copy the files straight from the Exchange server itself, this can be done via the Windows Explorer. The last way is the easiest way and as far as I have tested it works OK.
Besides the three files we already copied we need to copy a few files more, this can be done with the Windows Explorer:
- Exchange Server\bin\exchmem.dll
- Exchange Server\bin\extrace.dll
- Exchange Server\bin\Microsoft.Exchange.Common.dll
- Exchange Server\bin\Microsoft.Exchange.Diagnostics.dll
- Exchange Server\bin\Microsoft.Exchange.Net.dll
- Exchange Server\bin\Microsoft.Exchange.Rpc.dll
- Exchange Server\bin\ ExchangeUMTestPhone.exe
- Exchange Server\public\Microsoft.Exchange.Data.Common.dll
After all files have been copied you can start up the phone, this can be done by double clicking on the ExchangeUMTestPhone file.

The next step will be to setup the UMTestPhone, this can be done via tools en then choosing the option setup, you wil then get the following screen:

Fill in the following fields:
- server address: the ip-address/FQDN of the Exchange server
- caller id: the voicemailnumber of the Exchange UM environment
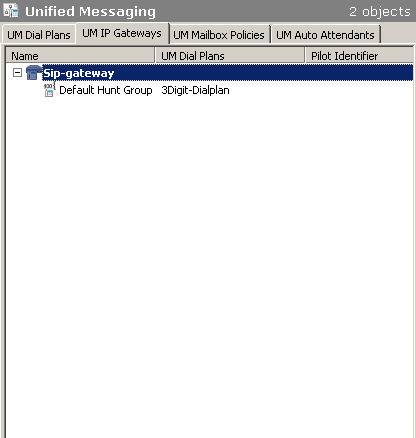
When you have finished all steps you only need to make one change on the Exchange server itself. The UM gateway needs to be modified so it points to the client that runs the UMTestphone. You can do this by opening the Exchange Management Console and then go ti Organization Configuration and choosing the option Unified Messaging. On the tab UM IP Gateways you can change the current gateway:
Comments
