When you have played with Exchange 2007 and Outlook Web Access earlier you may have seen a lot of differences between Outlook Web Access 2007 and 2003. There have been added nice features to the new version of OWA such as: you can access a file-server/sharepoint-server, you can restrict what files can be opened via OWA and how they are opened then.
Users can only use these functionalities if their mailbox is hosted on an Exchange 2007 mailbox server. The users who have their mailbox on an Exchange 2003 server will use the old version of OWA.
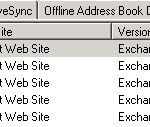
The OWA functionalities are delivered by the Client Access Server (CAS) if you had an Exchange 2003 environment running with OWA this functionality was provided by the Frontednd Server. When we zoom in to the Exchange Management Console en then have a close look ath the server configuration of the CAS server you will discover that it hosts mutiple websites:
The three that are important for Outlook Web Access are:
- owa, this is the 2007 version of OWA
- exchange, this is the 2003 version of OWA
- exchweb, this site contains most functionalities of OWA
Now you may ask yourself, what are those other directories used for:
- exadmin, this folder willl be used when you manage Public Folders from the Management Console
- public, this folder will be use when opening a Public Folder via OWA
We will restrict this tutorial to OWA 2007 only, so we will get the properties of the site named owa.
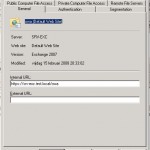
The first tab we see is general:
You can’t change much on this tab, it contains some information you may find interesting:
- which server is hosting the OWA
- under which website the OWA is placed
- for which Exchange version this OWA is responsible
- when has the website changed
There are two fields which you can fill in:
- internal url, here you need to define the url which users on the internal network use to access the OWA
- external url, here you need to define the url which users on the internet use to access the OWA
You need to pay attention to the url’s when you are going to buy certificates that you buy one for the correct url.
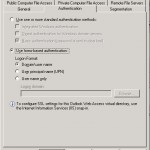
The next tab is authentication on this tab we can setup the way the user has to login to OWA. The default setting is Use form-based authentication below this option you can choose three methods to fill in the username:
- Domain\username, the user logs in like this test.local\johan
- User Principale Name, the user logs in like this johan@test.local
- User Name Only, the user fills in his username, in this case the field logon domain contains the domain where the user needs to login.
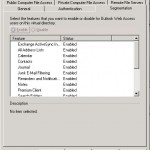
The next tab is segmentation on this tab we can control what options end-users will get when they use OWA. You can for example block the ActivSync integration or prevent the password changing in OWA.
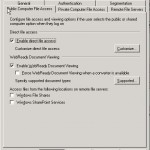
On the tab Public Computer File Access you can decide how OWA will react if a user tries to open an attachment while logged into OWA from a public computer:
- OWA needs to convert the file via the Web ready functionality
- OWA needs to prevent the opening/downloading of the file
- OWA allows to open/download the file
As you can see it has been changed a lot compared to OWA 2003. The first option enable direct file access let you configure which files the end-user may open without using the Web ready functionality. When you click on the customise button you can change the files allowed or blocked:
- allow, which files with the extension/mime-code may be opened
- block, which files with the extension/mime-code may not be opened
- force save, which files with the extension/mime-code first need to be saved before opening.
- unknown files, what does OWA need to do with "unknown" files
You see there are a lot of possibilities and you can really make changes to allow or block a file. The default settings are quite good, if you won’t allow mp3’s being opened via OWA then you need to delete it from the allow list. The option unknown files will be used when an extension/mime-code is not defined in the other 3 lists. The default option for unknown files is Force Save which tells OWA to first let the user download the file before opening it.
Another new feature in OWA is WebReady Document Viewing, this function will convert a file to a webpage with the build-in convertors. Normally this shouldn’t be the case because the option Force WebReady Document viewing when a converter is available is disabled. OWA contains converters for the following filetypes:
- Excel files
- Word files
- Powerpoint files
- PDF files
I think this are the most used files which you want to open using this new function. You don’t need to have the application installed locally on your pc/laptop.
The last two options on this tab make it possible to open files on remote file servers. With remote file servers you are able to open files on:
- Windows File Shares
- Windows SharePoint Services
The remote file servers need to defined on another tab called remote servers this will come later on in this tutorial.
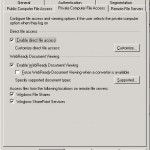
The next tab is Private Computer Access with this tab you can configure the same things as on the tab Public Computer Access only then for trusted computers/laptops. Default there are a few settings that are not the same as on the tab Public Computer Access for example the options to access Windows File Shares and Windows SharePoint Services is enabled.
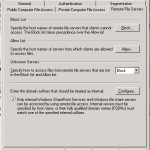
On the last tab remote file servers you can setup which servers are accessable via OWA. You can easily set this up by adding a server to one of the two lists. It would be a lot of work to add all the file-servers that you want to block and for example allow only one. For this case you can use the option unknown servers the action defined there will be used for every server who isn’t listed on the allow or block list. Default the action is block.
As you can see there is only one button left that we didn’t spoke about. The button configuration on the bottom of the tab. With this button we need to specify which domains need to be seen as internal domains. When a server is added from a domain that is not listed OWA will not see it as an internal server and will block access to it.
We now have spoken about all the tabs of OWA. The other things such as certificates will be handeled via the Powershell and IIS admin MMC.
When OWA is published on the internet it may be necessary to use a 3rd party certificate for the OWA, you can buy a certificate with for example VeriSign. OWA 2007 uses https and form-based authentication by default. Here a self-signed certificate is used, which can result in warnings from webbrowsers.
You will have to add a copy of the self signed certificate to the trusted root authority to prevent this error. You can get a copy of this certificate in two ways:
- via the website itself and then import it into the right store
- by exporting it via Powershell and import it in the right store
First via the website itself:
- go to the website
- click on continue when the warning is displayed.
- click on the certificate error button in the addressbar
- click on display certificate
- click on install certificate
- choose the option to save all certificates in the archive below
- select the trusted root authority via the browse function
- click on next en finish
- a warning will be displayed that you are importing a certificate, accept it
- a message will be displayed that the certificate is installed
All the steps above can be done on a client. All the steps below need to be executed from the CAS server:
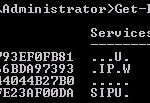
- execute the following domain: Get-ExchangeCertificate -DomainName mail.test.local
- an overview will be displayed with all certificates that are used by mail.test.local
- then we need to export the certificate: Export-ExchangeCertificate -Thumbprint 5113ae0233a72fccb75b1d0198628675333d010e -BinaryEncoded:$true -Path c:\certificates\export.pfx -Password:(Get-Credential).password
- when this command is executed it will prompt you for a username and password. The password is the only thing that is necessary to export and import the certificate.
- the last step is importing the certificate in the trusted root authorities on the client, optionally this can be done via a Group Policy.
Both warnings will result in not displaying the message anymore. When a 3rd party certificate will be installed the steps above are not needed. The only thing you should arrange is that you trust the root certificate from the 3rd party.
When you choose to get a certificate from a 3rd party we first need to create a CSR and after that when receiving the file from the 3rd party install it.:
- start Powershell
- run the following command: New-ExchangeCertificate -DomainName test.ocal -Force -FriendlyName OWA -GenerateRequest:$True -Keysize 2048 -Path c:\owa.req -privatekeyExportable:$true -SubjectName "C=NL, O=Test, L=Utrecht, S=Utrecht, CN=owa.test.local"
- this command will generate a CSR to get a certificate
- when we receive the certificate from the 3rd Party we need to install it
- importing is done by the following command: Import-ExchangeCertificate -Path c:\certificaat.crt | Enable-ExchangeCertificate -Services "IIS"
- with the parameter-Services we can tell Exchange that this certificate may only be use for IIS in this case. Other options are SMTP, IMAP and POP3.
If everything is configured we can check if OWA is working OK, this can be done in two ways:
- open https://owa.test.local/owa
- run the Powershell command: Test-OwaConnectivity
I use OWA 2007 for a few months now and I must say it’s working really good. I hope you have learned something from this tutorial.
