Microsoft has released OCS 2007 R2 Web Service provider a while ago, with this piece of software you will make a limited OCS client available via OWA. In this tutorial I will explain how you can get the OCS client working together with the OWA from Exchange 2010. You can download the software using the link below:
- Download OCS 2007 R2 Web Service Provider
- Hotfix 968802 (UcmaRedist)
Before installing the software make sure you have a certificate installed which is trusted by the OCS server. When you’ve downloaded the requested files you can start installing them. The file CWAOWASSPMain contains four seperate files and the patch file consists of one MSP file, the files need to be installed in the following order:
- vcredist_x64
- UcmaRedist.msi
- UcmaRedist.msp
- CWAOWASSP
When the files are installed it’s time to build the configuration. First we need to gather some information about the certificate being used by the IIS service, you can do this by running the following command in Powershell get-exchangecertificate |fl. You will get an overview of all installed certificates on the CAS server search for the one that is used for IIS, this one can be recognized by checking the entries after the services label. From this certificate we need the values of two fields:
- Issuer
- SerialNumber
Now we copied the values it’s time to make the modifications to the OWA configurationfile, you can find it in the following directory c:\Program Files\Microsoft\Exchange\v14\ClientAccess\Owa. Here you will find web.config , which contains the configuration for Outlook Web Access. Before modifying it create a backup of the file, this will let you quickly restore to the original configuration in case OWA doesn’t work anymore after the modifications. Then open the web.config using a text editor such as Notepad and search for the line containing the following word IMPoolName this is the firstline of the section which needs to be changed. Once found change the following lines:
- IMPoolName: fill in the name of the OCS pool
- IMCertificateIssues: use the value just copied from issuer, example: CN=company-DC01-CA, DC=Company, DC=Local
- IMCertificateSerialNumber: use the value justr copied from serialnumber, example: 61580B7D00000000000E
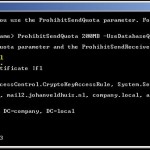
Once done save the file. Next step is to add the OCS client to the OWA, this can be done by using the Set-OwaVirtualDirectory –InstantMessagingType. On the internet you will find several stories about the value that needs to be entered after the InstantMessagingType parameter. The Technet documentation will tell you to use the OCS parameter but in some cases this won’t work according to several forum posts i found. If this is the case try 1 as the value for the parameter and check if it works. Although I don’t think the parameter is the issue since I’ve tried it in a working environment and Exchange gave the message that nothing had changed. To activate OCS in OWA you will need to run the command below to set the InstanteMessagingType parameter:
Set-OwaVirtualDirectory -InstantMessagingType 1
or
Get-OwaVirtualDirectory -server servernaam |Set-OwaVirtualDirectory -InstantMessagingType 1
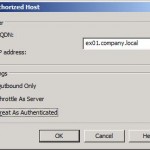
The Exchange side is completed, now it’s time for the OCS side. For this you will need to open the OCS administration tool and get the Front End properties of the pool. Here you will find the authorized hosts tab. Here you will need to add the following items:
- FQDN of OWA
When the fqdn has been added restart the Front End service to make the modifications active. Once the service is started again you will see the OCS client once logged in using OWA.
As you can see you can set your own status and see the status of other users. Besides this the left menu has been extended with a contactlist which corresponds with your contactlist in the MOC client.


