Propably every one has to do with spam today, sometimes you receive more spam then normal mail. There are a few anti-spam solutions which try to prevent spam mails in the users inbox, for example the Fortimail from Fortinet or the IMSS from Trend Micro.
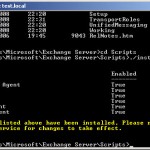
Exchange 2007 includes a few anti-spam agent to prevent spam. This filters are active by default on the Edge Transport server but also can be activated on the Hub Transport server by executing the following command in Powershell:
./install-AntispamAgents.ps1
This command needs to be executed from the scripts directory, you will find it in the Exchange install directory.
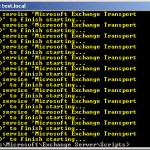
When the command is executed you need to restart the Transport Services, this can be done by executing the following command:
Restart-Service MSExchangeTransport</em>
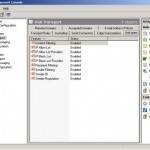
After restarting the Transport Services you can open the Exchange Management Console, when it is opened click on the Organizational Configuration and then choose HUB Transport. You will see there’s an extra tab added named Anti-Spam, click on it
You will see the anti-spam agents that are installed:
- content filtering
- IP Allow list
- IP Allow list providers
- IP Block list
- IP Block list providers
- Recipient filtering
- Sender filtering
- Sender ID
- Sender reputation
Below the agents are described per agent:
Content Filtering
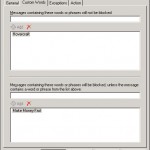
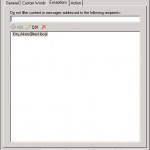
With this agent you can filter on keywords. For example you can filter on the words Make Money Fast, this can be seen below. But when you have a company that does sell Hovercrafts you don’t want mail with that word ends up in the junk mail. This word can be added to the top of the screen in the section named Messages with these words or phrases will not be blocked.
Besides the last called option there is a possibility to exclude mail-adresses from filtering. This can be done on the tab Exceptions.
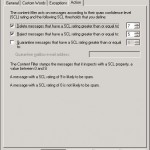
The final step is deciding which action needs to be executed, this can be: delete, reject or quarantaine. Per action you can define when it needs to be executed. Which action is executed depends on the SCL (Spam Confidence Level), this is determined by the IMF (Intelligent Message Filter) i.c.w. de words we setup earlier. When you are gone experimentate with the filter, for example put the SCL values lower. Then I would suggest to first choose the action to quarantaine it before choosing delete/reject as the action. This will safe you a lot of angry end-users that don’t receive their normal mail anymore.
Powershell commands:
Set-ContentFilterConfig -SclQuarantineEnabled:$true -SclRejectEnabled:$true -SclDeleteEnabled:$true -SclQuarantineThreshold 5 -SclRejectThreshold 6 -SclDeleteThreshold 8 -QuarantineMailbox spamQ@contoso.com -RejectionResponse ”Message rejected due to content restrictions” -AuthenticatedMessageBypassEnabled:$true -PuzzleValidationEnabled:$true -BypassedRecipients user1@contoso.com, user2@contoso.com
The content filter will be activated with the following options:
- Quarantaine will be activated for all mails with a SCL of 5 words will be placed in it, the quarantaine box has the following address spamQ@contoso.com
- Reject will be activated for all mails met a SCL if 6 this mails will be bounced, senders of the mail will get a mail back that their mail is bounced with the following text in it ”Message rejected due to content restrictions”.
- Delete will be activated for all mails with a SCL of 8 will be deleted
- When mail is sent to user1/user2@contoso.com the filter will not be applied.
- It turns on Autenticated Message Bypass
- It turns on Puzzle Validation
Get-ContentFilterConfig returns the current settings for the Content filter agent
Add-ContentFilterPhrase-Phrase:”This is an e-mail that you don’t want to receive” -Influence:BadWord
This command will add “This is an e-mail that you don’t want to receive” to the list of forbidden words or sentences.
Get-ContentFilterPhrase returns the current settings for the Content filter phrase agent
Remove-ContentFilterPhrase -Identity “This is an e-mail that you don’t want to receive”
This command will delete “This is an e-mail that you don’t want to receive” from the list of of forbidden words or sentences.
IP Allow List
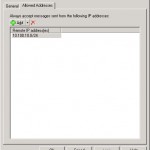
As the name already tells you this agent lets you create IP-address white-lists. This can be used for business-relations that are on a black-list but you still want to receive mail from them. When clicking on Addyou can add an ip-address of ip-range.
Powershell commando’s:
Set-IPAllowListConfig -InternalMailEnabled:$true -DomainController ad-server.test.nl
With this command you will setup the DC on which the IP allow list needs to be saved/
Get-IPAllowListConfig returns the current settings for the IP Allow list agent
Add-IPAllowListEntry -IPRange:192.168.0.1/24
Adds the IP-range 192.168.0.1/24 to the IP Allow list
Get-IPAllowListEntry returns the current settings for the specific IP Allow list entry
Remove-IPAllowListEntry -Identity <Integer> removes IP-address/the IP-range from the IP Allow list where the integer is the id from the specific rule.
IP Allow List Providers
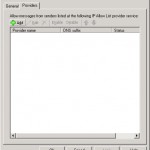
Besides RBL providers there are white-list providers. This are providers who provide lists with safe IP-addresses. On the following site you will find an overview of Whitelist providers: SpamLinks .
Powershell commando’s:
Add-IPAllowListProvider -Name:Example -LookupDomain:Example.com
The command above will add an Allow List Provider to the list with the name Example and domain/address example.com
Get-IPAllowListProvider returns the current settings of the IP allow list provider
Set-IPAllowListProvider -Identity Example.com -AnyMatch:$true
This command will tell Exchange that is has to check every e-mail with the Allow List provider example.com and will be threated the same despite the code that will be replied by the Allow List Provider.
Remove-IPAllowListProvider -Identity Example.com
Removes the provider example.com from the allow list provider.
Test-IPAllowListProvider</a>-IPAddress 192.168.0.1 -Provider ExampleProviderName
With this command you can do a lookup of the IP-address 192.168.0.1 with the White-list provider ExampleProviderName
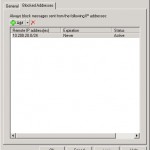
IP Block List
This agent contains IP-addresses who will be blocked by Exchange. It can happen that you don’t want to accept mails from specific IP-addresses or IP-ranges because you receive a lot of viruses or spam from them. In most cases it is easier to use a RBL provider then using an list with manual entries.
Powershell commando’s:
Set-IPBlockListConfig -InternalMailEnabled:$true -DomainController ad-server.test.nl
This command will tell to which DC the configuration needs to be saved.
Get-IPBlockListConfig returns the current settings of the IP Blocklist agent.
Add-IPBlockListEntry -IPRange:192.168.0.1/24
Adds the IP-range 192.168.0.1/24 to the IP Block list
Get-IPBlockListEntry returns the current settings of the IP Block list entry
Remove-IPAllowListEntry -Identity <Integer> deletes the entry of the IP-address/IP-range of the IP Block list with the id of the rule as the integer.
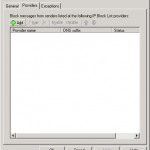
IP Block List providers
In this agent we can add RBL providers. This are organizations who provide lists with IP-addresses that are sending a lot of spam or servers which are configured as open-relay. On this page you can find an overview of them.
Within this agent there is an extra tab added exceptions, here you can exclude IP-addresses from this agent.
Powershell commando’s:
Add-IPBlockListProvider -Name:Example -LookupDomain:Example.com -RejectionResponse "Originating IP addressed matched to Example.com's IP Block List provider service"
This command will add a Block List Provider with the name Example and domain/address example.com. When an IP is found on list the sender will receive the following message: “Originating IP addressed matched to Example.com’s IP Block List provider service”
Get-IPBlockListProvider returns the current settings of the IP Block List Provider agent
Set-IPBlockListProvider-Identity Example.com -AnyMatch:$true
This command will tell Exchange to check every mail with the Block List Provider example.com. Despite the code that is being returned from the provider each mail will be threated the same.
Remove-IPBlockListProvider -Identity Example.com
Deletes the block list provider example.com from the IP Allow Block Provider agent.
Test-IPBlockListProvider-IPAddress 192.168.0.1 -Provider ExampleProviderName
This command will do a lookup of the IP-address 192.168.0.1 with the provider ExampleProviderName
Recipient Filtering
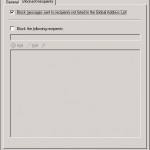
With recipient filtering you can filter messages on existing/non-existing recipients on the HUB transport without reaching a mailbox. This will prevent space being used by mails to non existing recipient such as administratornn@domain.com.
This agent can use the GAL as source, the GAL will be automatically updated when a user is added to Exchange. Besides that there is a possibility to manually add addresses that you want to block, when you use the previous mentioned option this is not necessary.
Powershell commando’s:
Set-RecipientFilterConfig-RecipientValidationEnabled:$true
Enables using the GAL as the source for recipient filtering.
Set-RecipientFilterConfig-BlockListEnabled:$true -BlockedRecipients klaas@domein.com,pietje@domein.com
Checks if the mail is send to klaas@domein.com or pietje@domein.com if this is the cases then the mail will be blocked.
Get-RecipientFilterConfig returns the current settings of the Recipient Filtering agent
Sender Filtering
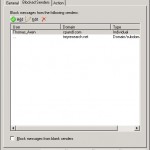
You may wish to block e-mails from specific senders because you receive a lot of spam from this address. Then you can use the sender filtering agent. Here you can specify addresses from which you don’t want to receive mail. Besides that possibility you can enable the option to block e-mails which contain no sender address. Depending on which action is activate on the tab action mail will be bounced or marked as spam.
Powershell commando’s:
Set-SenderFilterConfig-BlankSenderBlockingEnabled:$true -BlockedDomainsAndSubdomains *example.com -BlockedSenders klaas@domein.com,pietje@domein.com
When a mail is send from the domain or subdomain example.com mail will be blocked. When mail is send from klaas@domein.com of pietje@domein.com mail also will be blocked.
Get-SenderFilterConfig returns the current settings of the Sender Filtering agent
Sender ID
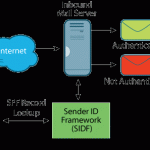
With sender ID you can prevent spoofing mails being delivered. When a mail arrives at the Hub Transport Server the SMTP header will be checked and according to the results a query will be done via DNS. The agent will search for a SPF record; in this record all IP-addresses are listed which are used by the domain to send mail.
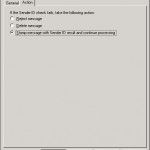
When the IP-address is not found in the SMTP-header, then the mail will be rejected, deleted or marked as spam.
Powershell commando’s:
Set-SenderIdConfig -SpoofedDomainAction Delete -BypassedRecipients klaas@domein.com,pietje@domein.com
When mail is send from a spoofed address is will be deleted except when it is send to klaas@domein.com or pietje@domein.com
Get-SenderIdConfig returns the current settings of the Sender ID agent
Test-SenderID -IPAddress 213.144.234.221 -PurportedResponsibleDomain example.com
This command let’s you manually check if the IP-addresses may be used to send mail from for a specific domain.
Sender Reputation
This agent will check the sender reputation. The sender reputation is determined by the following parameters:
- helo/ehlo analyse
- reverse dns lookup
- analysis by the content filter to determine the SCL level
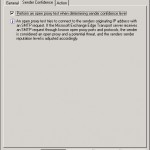
- open proxy test
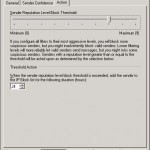
On the tab action you can specify how the filter will work, besides that you can specify how long the sender will be blocked. All e-mails that will be blocked by this agent will be blocked for 24 hours by default. Besides that you can define the following actions:
Powershell commando’s:
Set-SenderReputationConfig -SrlBlockThreshold 8 -SenderBlockingEnabled:$true -SenderBlockingPeriod 24
This command will block all e-mails that don’t pass the open proxy test and the SRL (Spam Reputation Level) is 8 or higher. The sender address will be blocked for 24 hours.
Get-SenderReputationConfig returns the correct settings of the Sender Reputation agent
This is a very long tutorial but I think we talked about all the points. When you like to have more commands, all Powershell commando’s are linked to pages on Technet which contain more info.
