Blat

If you would like to test the mail performance of your server then you could use jetstress to test your database. But when you would like to decide yourself what kind of e-mails you want to send to your mailserver then you should have a look at Blat. Blat is a command-line mailer which can be used in a batch file which send multiple mails to your mailserver. This program is not ment to be used for bothering other people with bulkmails. If you are interested in the tool then have a look at the site below.

Event ID 2050 on CAS Server

I have been very busy this week so I did not had many time to blog. Yesterday and today I visited a forum to have a look for interesting issues. One item I found was about Event ID 2050 on a CAS server. When looking at the details of the event you will see the following:

554 5.6.1 Body type not supported by Remote Host

Last week I found a message on the Technet forum which contained a question about how to disable 8 bit mime in Exchange 2007. So I started some research on mime types.

Prevent spoofing with IMSS

It’s time for a new tutorial but this time with another subject Trend Micro Interscan Messaging Security Suite, IMSS for short. IMSS is the antivirus/imss solution from Trend Micro which is available for Windows, Linux, Solaris and as appliance.</p>

With policies we can define our own rules, we will create a rule which will prevend spoofing. To do this we need to login to the admin console of IMSS. This can be done by selecting the option policy and then select the option policy list in the left menu.

Next we will choose the option new and choose the option other from the drop-down menu. Standard the option is selected that this rule needs to be applied to incoming mails.

First we define the sender/recipient en exclusions.

First the recipient, this can be done by clicking on the link recipient

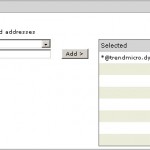
As recipient we select all the users in the domain trendmicro.dyndns.org

When you are responsible for multiple domains you can fill in all domains here. When all domains are added you can click on the save button. The next step is choosing the sender, this can be done by clicking on the link sender. Here we fill in the same domains as defined in the recipient option. When ready we will click on save again when all domains are added.

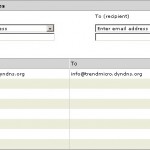
The last option is to define the exceptions, this can be done when using a form on your website which uses an e-mail address which exists in your domain as the sender. In this case we choose the address info@trendmicro.dyndns.org

In this case we only allow from info@trendmicro.dyndns.org to info@trendmicro.dyndns.org but this can also be the complete domain.

When we have defined all three options it's time to define the scanning conditions. Here we only need to specify one thing. In this case we want to check every mail which is bigger then 1 Kb.

When we are statisfied with the settings we click on next to continue and specify the action.

Because we don't want the spoofing mails to arrive in the mailbox of users we select the option delete entire message. In case you want to first have a look what the result is you can choose the option quarantine to this will ensure that mail is placed in quarantine.

When the action is defined it's time for the last step, define the name and rulenumber. This last two fields can be defined with whatever you like. In our case we defined the name of the rule as anti-spoofing and placed it as the 8th rule.

Were finished now with creating the anti-spoofing rule. Keep in mind that this wil also block mails from sites which let you forward articles and use your e-mail address as sender, inform your users about this.

Non Delivery Report codes

I think everybody has seen them, Non Delivery Reports, a familier example is 5.7.1 which gives the user a message back that relaying is not permitted. All errorcodes are based on several RFC’s one of them is RFC3461. On Technet you can find an article with the most common NDR’s.

Update Rollup 4 for Exchange Server 2007 Service Pack 1

Microsoft has released rollup 4 today for Exchange Server 2007 SP1.  This rollup pack contains several fixes for several bugs in Exchange 2007 SP1:

Export items to a PST and delete them from the mailbox

Deleting items from a specific mailbox can be done really easy via the Powershell using the command export-mailbox. Before deleting the items it may be usefull to make a backup of this items. You can create a backup to a PST of to a special mailbox.

Microsoft Exchange Server 2007 Service Pack 1 Help

Microsoft has released the stand-aline version of the help file of Exchange 2007 SP1. It’s always nice to have the help file on your laptop if you would like to search for something quick.

Block backscatter mails with Exchange 2007

Backscatters are still active NDR’s who will be delivered to companies where after some investigation the mail is never send from. There are a few possibilities to prevent this, one of this is with SPF records.</p>

I went for some further investigation on how to block those irritating mails. I found out that it could be done with Transport Rules in Exchange 2007.

In this tutorial I will explain how you can configure to get rid of the irritating backscatters.

First we will create a transport rule which adds a tag to the header of an e-mail. With this we can recognize e-mails which are send from our own server.

We can do this by opening the EMC and go to the Hub Transport Server via the Organizational Configuration. After that we can open the tab Transport Rules.

Next step is selecting the option to create a new Transport Rule in the right menu.
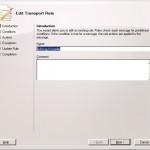
In this case we choose the following name Add tag to header but this can be any name you like. When you've choosen the name you like you will click on next

On the next page we will select which conditions the mail must met before we will apply the transport rule
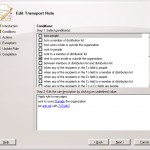
Here we define that we want to apply the rule on every mail that is send to outside via the Hub Transport server. When this has been defined we click on next
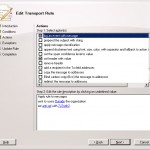
Next step is the action that needs to be executed. As I said earlier we want to add something to the header of the mail. We can do this by selecting the option set header with value. This rule will be added to the lower part of the screen. The only thing we need to specify is the values we want to add.

First we will define the tag itself
We will give the tag the name anti-spf , this is a name you can change if you like, remember it because we will need it later on. Next we need to specify the value that we want to give to the tag. The best option is to give it a random value. This makes it a little bit harder to hack, but it's still possible because it's a static value
When both values are defined we will click on next

We will get a short summary en we can click on next to continue. When the rule is created succesfully we will get the screen below
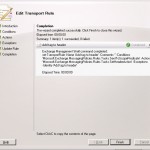
Each mail who is send to the outside world will get an extra tag in the header anti-spf: 7uTreth2

The next step is to create a Transport Rule who checks if the NDR mail contains the tag.

To do this we will select the option to create a new Transport Rule in the right menu
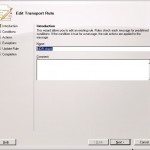
We will give it a name, in this case NDR Check, and click on next
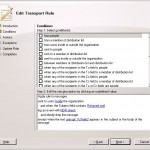
The next step is to define the conditions the mail must met before we will apply the Transport Rule. In this case we chec:

  • if the mail is send to internal (sent to users inside your organization)
  • if the subjected contains Returned mail (Subject field contains specific words)
When selecting the option Subject field contains don't forget to add the value Returned mail manually.

The next step is to define the action that needs to be executed
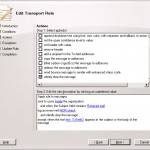
In this case we define that

  • an item should be logged in the event log with the text NDR Check
  • the mail should not be delivered

It can be that the action drop the message is OK for you, in this case you only need to select this one. When you are satisfied with the settings click on next.

The last step is to define the exceptions, if we don't do it all mails to internal users with the text Returned mail will be dropped. This is not what we want because this would cause legal NDR's also to be dropped.

By checking the body of the mail for the text anti-spf: 7uTreth2 we can prevent that legal NDR's will be blocked.
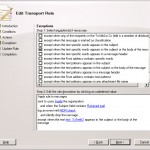
When this is defined we click on next en the rule will be created. When the rule is created succesfully you will get the screen below
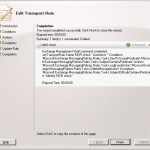
I must admit that it will cost you some time to create the rules but it wil save you a lot of calls from users with questions about NDR's.
0X8004010F and OAB