Organizational forms were used in Exchange 2003 by several applications and were very easy to implement. In Exchange 2007 this is a bit more complicated to configure organizational forms.
In this tutorial I will explain how you can configure organizational forms inExchange 2007. Before we start make sure you have the software mentioned below:
The first step is to create the organization forms library, this can be done via Powershell by using the command below:
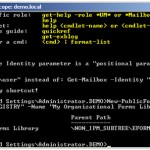
New-PublicFolder -Path "\NON_IPM_SUBTREE\EFORMS REGISTRY" -Name "My Organizational Forms Library"
When the library has been succesfully created you will see the same result as below
When it is created you can see the folder by using the Public Folder Management Console from Exchange 2007. The folder is created in the Systen Public Folders
When this has succeeded we can start using MFCmapi to continue the configuration.
Start MFCmapi and when asked create a new profile of select an existing one. When logged in with the profile select the session menu and choose the option Logon and Display Store Table. You will see something like below
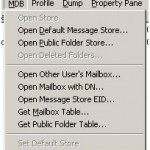
Select the menu MDB and choose the option Open Public Folder Store and select OK
An overview of the Public Folder Store table will be displayed. Open the following folders Public Root, NON_IPM_SUBTREE, EFORMS REGISTRY and select the organizational forms library just created. In this case My Organizational Forms Library.
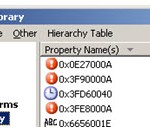
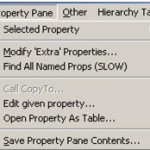
When you have selected the correct folder you will need to find the value PR_URL_NAME in the right side of the screen called property name(s). Select the value and choose the menu property pane and choose the option modify extra properties.
A new window will be opened, select the button select property tag
A new window will be opened again, this windows will contain a long list of properties which can be added. Search for the property PR_EFORMS_LOCAL_ID and choose OK.
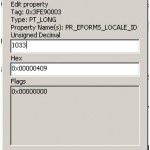
Click on the OK button again and startsearching for the property PR_EFORMS_LOCAL_ID, a red cross will be displayed in front of it. Doubleclick on the property, a new window will be opened
In the field unsigned decimal fill in the value of the language the forms library will be used for. In this case English, for a full overview of all languages have a look at the following page .
Close MFCmapi, the only thing we need to do is specify the permissions on the forms, this can be done with the commands Add-PublicFolderPermission and Add-PublicFolderAdministrativePermission.
First we will specify the client permissions:
Add-PublicFolderClientPermission
Supply values for the following parameters:
User: domain\Johan AccessRights[0]: FolderVisible AccessRights[1]: ReadItems AccessRights[2]: Identity: \NON_IPM_SUBTREE\EFORMS REGISTRY\My Organizational Forms Library
The command above will give the user Johan the permissions to view the folders and read the content of them. This can be done per user or per group, simply replace the username by the groupname.
Next step is specifying the administrative permissions:
Add-PublicFolderAdministrativePermission
Supply values for the following parameters:
Identity: \NON_IPM_SUBTREE\EFORMS REGISTRY\My Organizational Forms Library User: domain\domain admins AccessRights[0]: AllExtendedRights AccessRights[1]:
This will ensure that all users that are a member of the domains admins group have all rights on the folder.
For more information on permissions on Public Folders have a look at the sites below.
Add-PublicFolderPermission Add-PublicFolderAdministrativePermission
