In Exchange 2010 SP1 beta you will find a lot of changes. In this tutorial I will have a closer look at the Unified Messaging Role from Exchange 2010 SP1.
Before starting the installation of the UM role you will need to ensure that you have installed the two prerequisits mentioned below:
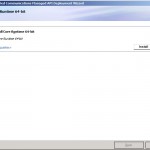
This is one of the new things in Service Pack 1, in the RTM version this was not necessary. In RTM you only needed to install the prerequisits using the Excahnge-UM.xml file. The files mentioned above are additional to this. Please pay attention when installing the Unified Communications Managed API 2.0 it might look the installation is done very quickly. But what is only done during the installation is extracting the files to C:\Microsoft UCMA 2.0 RuntimeInstaller Package\amd64 here you can find the file SetupUcmaRuntime which does perform the installation of UCMA 2.0.
After the files have been installed you can start the installation of Exchange and select the Unified Messaging Role. Besides selecting the Unified Messaging Role don’t forget to place a checkmark before automatically install Windows Server Roles and Features required for Exchange Server. This new option will install all Windows Server Roles and Features necessary for the installed Exchange role.
Once installed it’s time to start the Exchange Management Console and selecting the UM Server which can be found under the organizational configuration tree. On the organizational configuration level you can configure the following things:
- dial-plan
- gateway
- hunt group
- auto attendant
- UM policy
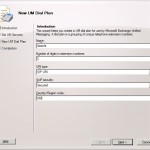
Let’s begin with creating the dial-plan. First we need to specify the name, the length of the extensions, URI type, VOIP Security and Country/Region code. Depending on what kind of implementation you are performing you might chose other options for the URI type and VOIP security. In this case the dial-plan will be used to attach the Exchange UM server to an OCS 2007 R2 environment.
In the next step we will need to add the servers attached to the dial-plan. In this case it’s only one server but in an environment where you’ve got multiple UM servers you can easily add them all here.
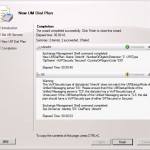
Before the dial-plan is created you will get an overview of the settings which will be used. When pushing the New button the dial-plan will be created.
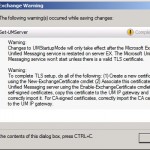
When the dial-plan is created you will see a warning. This warning is the result of the default configuration of the UM server. The UM Server is default configured to accept traffic using TCP. Since we configured the dial-plan to accept only traffic which is secured we will need to modify this option on server configuration level so that the server will accept TLS traffic.
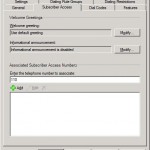
After the wizard has been closed you will need to get the properties of the dial-plan to configure the subscriber-access. This feature can be used by users to call their mailbox to, for example, check if new mails have arrived. Once you get the properties of the UM server select the subscriber access tab and add the extension which you would like to use fot this functionality.
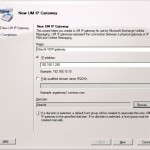
Next step in the process is to add the gateway to which the Exchange UM server will need to send it’s traffic to.
We will only need to specify a name, IP-address of FQDN of the gateway and the dial-plan which may use this gateway.
During the creation of the gateway a hunt group will be automatically created. In some cases it may be necessary to remove the hunt group and create a new one. This because the pilot identifier will not be configured by default. If want to skip the creation of the hunt group don’t select a dial-plan and attach the gateway manually to the dial-plan.
Default a UM Mailbox policy will be created during the creation of the dial-plan. With this policy you may not have to change things as the settings are OK for your organization. But if you like to make changes to the text of the message which is send to the users when they are UM enabled then modify the policy.
Beside the text there are a lot of other settings which are defined by this policy. For example the pin policies which you would like to apply to users: complexity, minimum pin length and wrong pin attempts.
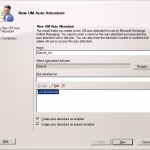
Optional it’s possible to configure an auto attendant. This is an electronic operator which can transfer calls and play a menu to the caller with options which will transfer him/her to the correct department.
The configuration at organizational configuration level is finished and so it’s to configure some things on server configuration level. Get the properties of the UM server and select the UM Settings tab. Change the value of the startup mode to TLS or Dual and press OK.
A warning will be displayed that the Exchange UM service will need to be restarted and that you will need to verify that a valid certificate is assigned to the service. The certificate is important because we selected secure at the dial-plan. This will ensure that all traffic is secured using certificates for authentication. If an invalid certificate is used by one of the parties the communication will fail.
If you decide to install the certificate later then you may have some issues with restarting the Exchange UM service. This because the self-signed certificate is not assigned to the Exchange UM service.
Configuring UM can be dan a lot easier when using Powershell. Below you will find an overview of commands which you can use to create the configuration exactly as done via the GUI:
New-UMDialplan -Name Utrecht -UriType SipName -NumberOfDigitsInExtension 3 -VoIPSecurity Secured -AccessTelephoneNumbers "110" -CountryorRegion 030

New-UMIPGateway -Name "Utrecht VOIP Gateway"  -Address 192.168.1.250 -UMDialplan "Utrecht"

New-UMAutoAttendant -Name Utrecht_AA -UMDialPlan Utrecht -PilotIdentifierList "+313012345100" -SpeechEnabled $true

Set-UMserver -identity "ex" -DialPlans "Utrecht" -UMStartupMode "TLS"
If you like Powershell then I recommend to use it because configuring UM goes a lot faster.
New in SP1 are two additional expensions for the UM role, these can be found under tools in the Exchange Management Console:
- Call Statistics
- User Call logs
First the call statistics, this report utility can be used to generate overviews of calls which are processed by your Exchange UM server. This may be very usefull when you would like to get an overview of how much users will use the UM functionality of Exchange.
Besides to the overall overview you can generate reports per user using the user call log. In this overview you can for example see how much calls a user receives and which quality the call was. This may be very usefull when troubeshooting the quality of calls
But what are the other changes in SP1 when looking at UM:
- you can assign a second dial plan to a user. In some scenario's ut may be usefull to assign a second extenstions to a user.
- cross-forest migration of UM-mailboxes is possible
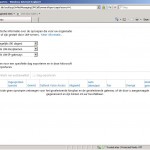
- UM Settings can be managed using the Exchange Control Panel
- no support for Exchange 2010 SP1 in combination with Office Communication Server 2007
Remark: all features and screenshots mentioned in this article are based on the beta of SP1 and may change in the final release.
