As you may now you can do many things with Powershell to get things done in Exchange. Somethings can only be done via Powershell.
One of those things is creating users via a CSV file, it’s really usefull when you need to create a lot of users in one time. You can make it as nice as you want if you have the information available in the CSV file.
We could type in the command each time to read the CSV file and then create the users, but why shouldn’t we do it via a Powershell script ?
A Powershell script can be made with Notepad, the only thing you need to do is save the file with an .ps1 extension.
Below the script that we are gone use:
Param(
[string] $MailboxTemplate,
[string] $CSVFile
)

$Temp = ConvertTo-SecureString P@ssw0rd -asPlainText -Force

$Template = Get-Mailbox "$MailboxTemplate"

Import-CSV $CSVFile | ForEach-Object -Process {New-Mailbox -Name $_.Name -FirstName $_.FirstName -LastName $_.LastName -UserPrincipalName $_.UPN -OrganizationalUnit $_.OU -Database "First Storage Group\Mailbox Database" -Password $Temp -TemplateInstance $Template}
First we arrange that we can give some parameters while executing the file, this parameters we need to execute the script, in this script we have 2 parameters:
- $MailboxTemplate, the name of the template-mailbox (string)
- $CSVFile, the name of the csv file (string)
All parameters should be supplied as a string format, except the password. It isn’t possible to use a password in a script without modifying it first. To prepare the password for using it in the script we need to put in the following piece in the script:
$Temp = ConvertTo-SecureString P@ssw0rd -asPlainText -Force
We will set the $Temp to be equal against the protected string that is generated from P@ssword
$Template = Get-Mailbox “$MailboxTemplate”
The next step is to arrange that $Template gets the value of the output of the command. The command will get the mailbox name containing the name that was specified with the %MailTemplate parameter. This is a mailbox that we will create before we execute the script as a template for all new mailboxes.
When all parameters are specified we can run the command. To import a CSV file we use the CSV-import command.
Import-CSV $CSVFile | ForEach-Object -Process {New-Mailbox -Name $_.Name -FirstName $_.FirstName -LastName $_.LastName -UserPrincipalName $_.UPN -OrganizationalUnit $_.OU -Database "First Storage Group\Mailbox Database" -Password $Temp -TemplateInstance $Template}
This rule can be cut in to pieces:
- Import-CSV $CSVFile, with this piece we will arrange that the file being specified as the parameter $CSVFile will be imported.
- ForEach-Object -Process, this command will tell the script to run every following command between the acolades will need to be run when a new line is read from the CSV fil
- {New-Mailbox -Name $_.Name -FirstName $_.FirstName -LastName $_.LastName-UserPrincipalName $_.UPN -OrganizationalUnit $_.OU -Database "First Storage Group\Mailbox Database" -Password $Temp -TemplateInstance $Template}, in the last pieve we will replace all parameters with values from the CSV file. In this case the mailbox will be created in the First Storage Group in the Mailbox Database database
The script needs to be saved in the script directory. This directory can be found in the install directory of Exchange 2007.
Before executing the script we need to do two things:
- create the template
- create the CSV file
The template is really easy, it’s the same as creating a default user only we will use it as a template.
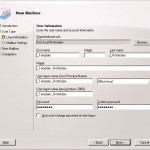
We will create the template via theExchange Management Console, I guess you have used it a few times and start with the wizard.
We will try to complete all fields, choose a name that you can easily recognize, for example _template
When finished click next next
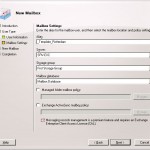
In the screen above it’s important to choose the correct Mailbox Server, this will be used for all users who are created via this template. The Storage Groupwill be hardcoded in the script.
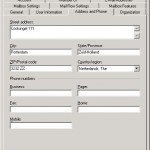
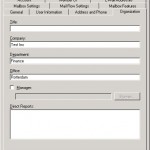
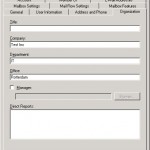
When the user is created you can get the properties of the user and go to the tabs Address and Phoneand Organization and fill in the fields that are generic for each user. This is optional and you can choose to do this also via the script, for this you need to add some extra fields to the csv and extra code to the script to import these fields.
Some values will be automaticly assigned to new users: Cityand Country/Region, this will ensure that it doesn’t cost you a lot of time to fill it in manually. Some values are not being parsed, fields such as Zip-Code and Street Address are examples of this.
If you want to create users in different departments, it may be easier to create multiple templates. This because I haven’t found out how you can specify using the new-mailbox command.
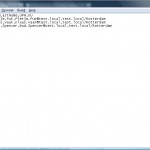
Now that we have created the template mailbox we only need to create the CSV file, this can be done via Notepad or Excel. I created a CSV myself in Notepad.
Now that we have done all preparations it’s just a matter of running the script. You need to execute the script via the Exchange Management Shell:
CreateNewUser.ps1 -MailboxTemplate "_Template_Rotterdam" -CSVFile "c:\users.csv"
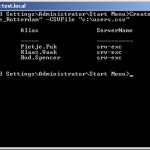
When the script is completed you will have the following result:
After a refresh, when the Exchange Management Consoleopen is left open, you can see the users there too.
As promissed a the extra piece of script that will arrange that the fiels from the Address and Phone en Organization tab will be used:
|Set-User -Department $_.Department -Office $_.Office -Phone $_.Telephone -StreetAddress $_.Street -City $_.city -PostalCode $_.PostalCode -CountryOrRegion $_.CountryOrRegion
The piece between the accolades now looks like this:
{New-Mailbox -Name $_.Name -FirstName $_.FirstName -LastName $_.LastName -UserPrincipalName $_.UPN -OrganizationalUnit $_.OU -Database "First Storage Group\Mailbox Database" -Password $Temp -TemplateInstance $Template |Set-User -Department $_.Department -Office $_.Office -Phone $_.Telephone -StreetAddress $_.Street -City $_.city -PostalCode $_.PostalCode -CountryOrRegion $_.CountryOrRegion}
The CSV file needs to be extended with the values of the fields:
Name,FirstName,LastName,UPN,OU,Department,Office,Telephone,Street,PostalCode,City
A user will now look like this:
Pietje Puk,Pietje,Puk,Pietje.Puk@test.local,test.local/Rotterdam,IT,Rotterdam,010-1234567,Coolsingel 111,2332 ZZ,Rotterdam
Executing the script goes the same:
CreateNewUser.ps1 -MailboxTemplate "_Template_Rotterdam" -CSVFile "c:\users.csv"
In the Exchange Management Shell you don’t really get a good output, therefor we need to look in the Exchange Management Console:
This is the end of this tutorial, it’s quite a long one I think, but it’s very useful when you need to create multiple users in Exchange 2007.
